The LightJar user’s guide explains how to use LightJar. You are welcome to read it here on this webpage, or download the PDF file copy for printout and future review. The LightJar Support Center has this same information, as well. Depending upon your past experience, the user interface for LightJar may look familiar or look complicated, but after using it a couple times, the interface becomes simple to use.
LightJar is a web based storage service for saving your important media recordings (video, audio, photos, etc.) for future viewing, reminiscing and sharing. All features and tools described in this guide are the same for the LightJar application when used from a desktop computer, laptop, tablet, and smart phone. There are some exceptions and work-arounds for mobile devices.
IMPORTANT: When using LightJar action features, Green messages pop up to acknowledge and confirm to the user that their actions on an item or collection of items were successful. Red messages indicate that an error has occurred, or that something was not done correctly.
Contents
- Log-in to LightJar
- My Media home page
- Uploading your files into LightJar
- Organizing your files, and adding information about them
- Viewing or playing your files
- Sharing your media files with others
- Receiving media files from other LightJar subscribers
- Deleting files from your account
- Managing your subscription
- Restoring files from archived state
- Final Message about LightJar as a web application
Log-in to LightJar
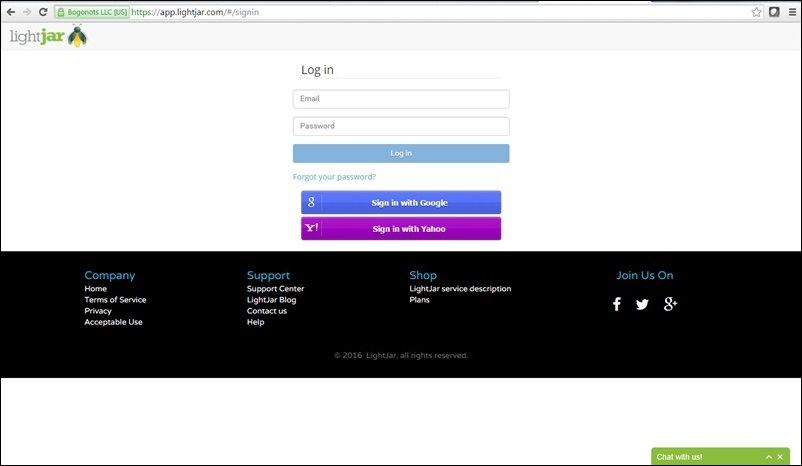
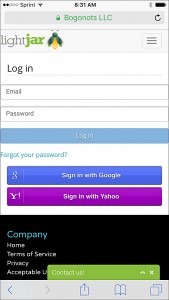
Log-in to your LightJar account begins here: https://app.lightjar.com/#/signin. Access to your LightJar account requires a log-in via an e-mail address and password. Click on “Forgot your password?” and LightJar will help you reset your password.
New subscribers can sign up for LightJar using their Google or Yahoo log-in credentials. Subscribers may change their passwords if needed, as well as, create their own secret question and answer. LightJar administrators will refer to the secret question when contacted by the subscriber before acting upon the subscriber’s behalf.
My Media home page
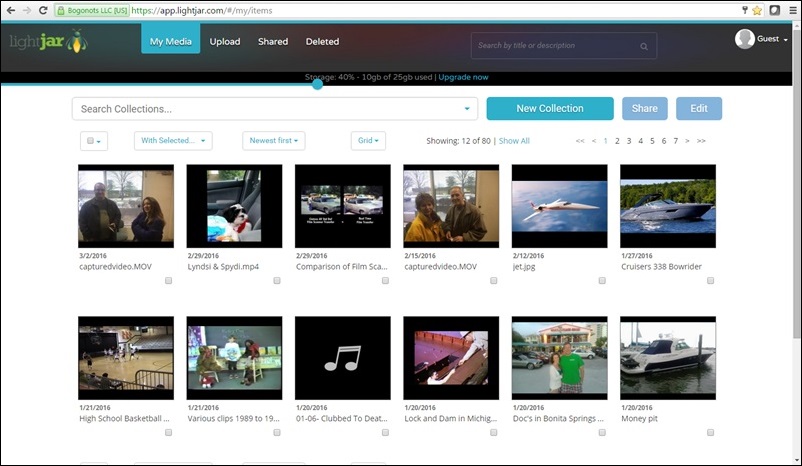
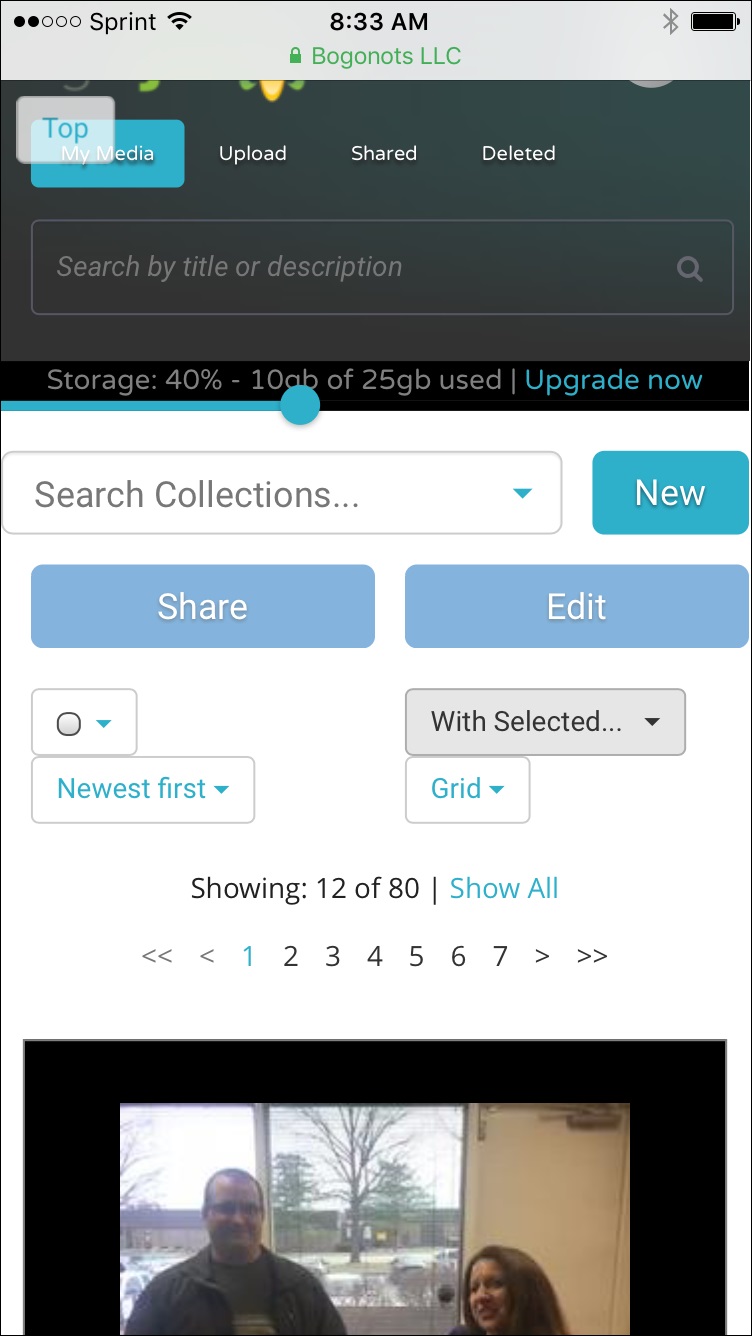
Upon log-in into LightJar, the My Media Home Page (above image) is the starting point for accessing the application’s features and tools to manage your storage account. For purposes of this discussion we will divide the My Media page into 3 parts, and review briefly what is contained in each part. The page has a header, body, and footer.
The header contains the following:
- My Media tab – home page, clicking this returns the user to the home page
- Upload tab – go here to upload files into your LightJar account
- Shared tab – listing the files previously shared with friends and family, along with other helpful information points and feature buttons
- Delete tab – containing all files deleted, and waiting for eventual permanent deletion or restoration
- Search Box – finding stored files based upon files’ saved name, title, description, and place
- User Name – clicking on user name shows a drop-down menu providing access to various support services, subscription management, and the logout function
- Horizontal Storage Meter – shows the size of your subscription and how much of your storage is used
The body of the page, from top to bottom, contains:
- A row of tools for managing your Collections, or groupings of files
- A row of Action buttons and features for managing files and their display within LightJar
- The Display Area for the thumbnail images of the files stored in LightJar NOTE – for initial turn-on of LightJar, we pre-populate this area with three (3) thumbnail images to provide new subscribers with a sense of how things look.
- A duplicate row of Action and display buttons for LightJar files
The footer contains:
- Access to information about our terms of service
- Access to a Chat line, Help Desk, and Support Center
- Contact Us information
- Descriptions of LightJar’s service and pricing
Uploading your files into LightJar
After log-in and landing on the My Media home page, you may wish to add media files to your LightJar storage account, especially if you have just signed up for the service.
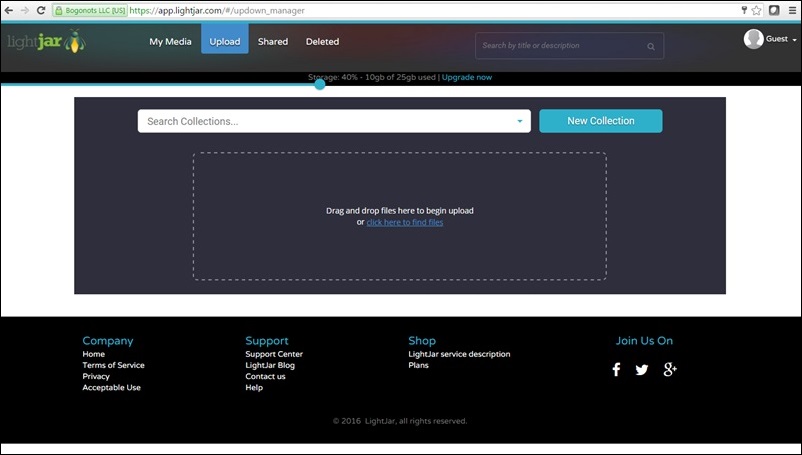
- To upload a file or files into LightJar, first click the Upload tab at the top of the page. The Upload page opens up.
- Drag items from your computer or smart device, and drop them into the field outlined in dots that contains the words “Drag and drop files here to begin upload”. Or click the link “click here to find files” to select the file(s) on your computer or smart device that you wish to upload.
- The upload process for your files starts immediately. The faster your internet connection, the faster your upload speeds. Currently, the maximum file size that LightJar can upload is 50GB. LightJar can accommodate the upload of multiple items at one time from desktops, laptops, tablets and Android smartphone; however at this time, LightJar can only upload one file at a time from Apple IOS mobile devices – iPhones and iPads.
- Hint: It is recommended that you upload your files into a Collection, because having files grouped in this way will make it easier and quicker to locate a particular file for later viewing, downloading or sharing. Choose an existing collection, or create a New Collection on this page, and then upload your files into the designated collection. You can title the Collection after the day’s date of the upload if nothing else comes to mind. If creating a New Collection, make sure that this collection’s name is what appears in the search box before initiating the upload. You may need to search for it, after creating it, to ensure that this collection’s name appears.
Organizing your files, and adding information about them
LightJar has tools to organize and group media items; as well as, edit the information about them. The bulleted items below provide an understanding of how information is set up within LightJar, and how you can edit and organize the files for better future retrieval.
- Initial information about your files – When a file is first uploaded into LightJar, the application records the following information that is forever linked to the file while in LightJar storage:
o Original file name
o File size
o Object name assigned by LightJar (for quicker searches of the storage database)
o The LightJar create date, including time of day
- Thumbnail Images – when uploaded into LightJar, a representative thumbnail image is made for each file. Thumbnail images are the only way your files are represented within LightJar. Each thumbnail also displays the name of the file (or its assigned title) and the upload date. You are able to change the arrangement of thumbnail images, sorting them by date of upload, file size, or alpha-numeric titles. Thumbnails are typically displayed in a Grid on the My Media homepage, but the user can also choose a List view. When in List view, more information is displayed for each file, such as an item’s description.
- Proxy files for video files – the majority of video files uploaded into LightJar have a mp4 proxy copy automatically made of the original, and it is the proxy file that is shown when a user wants to play their video within LightJar. Proxy mp4 files are viewable on almost all browsers and more tolerable of Web constraints. The original file is always available for download when needed.
- Adding or changing information about the Files – click on a thumbnail image to open a media item, and then click Edit. Click Save after you make your changes, or Cancel if you do not wish to save your changes. When you edit an item, the original, initial file information is always displayed and cannot be changed. However, you can add or later change the following information fields for any file in your LightJar account.
o Title for your file, the default is the file’s name when uploaded
o Date of the file, the default is the file’s upload date into LightJar
o Location – where the video or photo was taken
o Description – words to describe the media item – why, who, where, when, how, etc.- adds value to what you are saving, makes it more meaningful later on
o Current Collections – which Collections or groupings this file is assigned to in LightJar
- Search – the search field is at the top of the LightJar application. Any information contained in the file’s name, title, place, or description is searchable, and quickly found. The search field recognizes both alpha and numerical characters.
- Collections – a collection is a grouping of files or media items according to a common theme. Examples of common themes are date, place, event, person, or thing. Any media item can be assigned to multiple collections.
- To create a new Collection – click on New Collection on the My Media home page. A pop-up window appears. Enter information in the fields for Title, Date, Where, and Description and click Save.
- Adding Files to a Collection – there are four (4) ways to add files to a collection
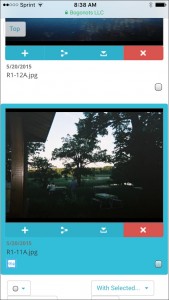
- Add files, one at a time, to a Collection – go to a thumbnail image representing the item on the My Media home page or on a Collection page. Click the ‘+’ or plus sign icon in the thumbnail, and a Collection popup window appears. Pick an existing Collection for your item within the popup window, or create a new Collection. Click Add to complete adding the item into the designated Collection
- dd multiple files at one time to a Collection – click the checkbox (lower right corner) on multiple thumbnail representations displayed on the My Media home page or on a Collection page. Go to the ‘With Selected’ box menu, located in upper left or lower left corners of the display page, and choose ‘Add to Collection’, and a Collection popup window appears. Pick an existing Collection for your item within the popup window, or create a new Collection. Click Add to complete adding the item into the designated Collection. Make sure the designated collection is displayed in the selection field before clicking Add.
- Upload files directly into a collection – click on the Upload tab (in the top navigational header) to go to the Upload page. Before uploading media files into your LightJar account, first choose a Collection from the drop-down menu or create a new Collection into which the new media items will be placed. Continue with the Upload process and the new items are uploaded directly into the designated Collection. The new media items are displayed on both the My Media page and within the assigned Collections page
- Place files into a collection when editing the file – click on a thumbnail representation of your item on the My Media home page or on a Collections page to open up the Detailed Media View page. Click Edit to display the editable fields for your item, including title, date, description and assigned collections. Pick an existing Collection for your item within the popup window, or create a new Collection. Click Save to complete adding the item into the designated Collection. Files can be assigned to multiple collections.
- Finding Collections – after you create a Collection, there are 3 ways to later find it within LightJar
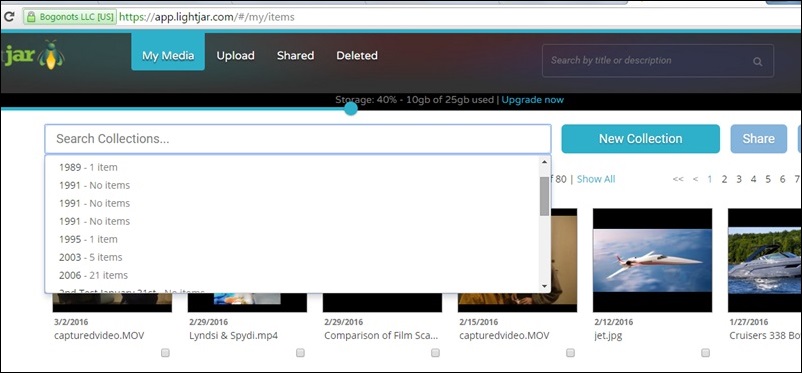
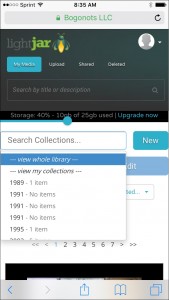
- The Search Collections field on the My Media home page shows a drop-down list of Collections that you scroll through to find your Collection; the current default sort of the items in the listing is numerical and then alpha A – Z;
- Begin typing the name of the Collection in the Search Collections field, the list of collections matching your typed characters is displayed, with the list getting smaller as more characters are typed, finally displaying the wanted Collection;
- Click on View My Collections, the second item in the drop-down list within Search Collections. This produces a page that shows the representative thumbnail for each collection in a grid view. You can change the ways in which the collections are displayed, choosing grid or list view, and sorting collections by date or alpha-numerically.
- Picking a Thumbnail to represent a Collection – the View My Collections page, located in the drop-down menu of the Search Collections field, displays a thumbnail for each collection. The thumbnail image for the collection is automatically assigned by LightJar and is based upon the file in the collection with the oldest date. To change the representative thumbnail for a collection, edit the date of the file, having the desired thumbnail image, to a date older than all other files in the collection.
- Editing and Deleting Collections – select a collection from the Search Collections field (via drop-down listing, or typing in the name of the collection) and then click Edit. A pop-up window displays the information about the collection that can be edited. There is also a Delete button. Deleting a collection is final. If you make a mistake, you can recreate the collection again, and re-populate it again with the thumbnail images of the desired files. NOTE – deleting a collection and its included thumbnails will NOT delete the original files. The original files are still listed in the My Media homepage.
Viewing or Playing your files (no need to download)
Watch your videos, or view your saved photos stored in LightJar from wherever you have Internet access
- To view or play a media file, first click on a media item’s thumbnail image to display a photo, or the representative still image of a video recording, or the audio player for an audio recording. After clicking on the thumbnail image, the media file opens up, and if the file is a video or audio recording, clicking on the play button initiates play. There are tools to expand the screen, regulate the volume, and pause or continue the play of the recording.
- Playing uploaded or shared videos – For any type video file uploaded into LightJar, the application automatically produces a second Internet-friendly MP4 proxy file copy that can be played from any device with a modern Internet browser. So if you upload an MOV movie file from your iPhone, a representative (proxy) copy is made so you can view the same movie from an Android smart phone or Windows tablet (which do not play MOV movie files in their browser). In all cases, it is actually the proxy file that plays when you click the play button within LightJar.
- To download the media item to your computer, laptop, tablet or smart phone – click on the download icon displayed on the left side of thumbnail image or in the left upper corner of the opened media item. Download gives the subscriber the original “as-recorded” file type. So in the previous example, you would be downloading the MOV movie file. (At this time, LightJar is unable to download files for storage onto iPhones and iPads.)
- Playing audio files – currently in LightJar, only MP3 audio recordings will play in every browser. WAV and AIFF audio files play in some browsers, but not all. To play an audio file that cannot be played inside LightJar, you will need to first download the file(s) onto your computer or tablet, and then the device’s media player can play the desired files.
- Slideshows – when a thumbnail image is clicked the media file opens up, showing the photo image, or the still frame of a video, or the audio player for a sound recording. On the left and right of the opened file are arrows that can be clicked to go forward or backward to see other items on the My Media homepage or within an opened Collection. For mobile device users, in addition to the clicking the arrow, they can also swipe the image to get to the next file.
Sharing your media files with others
Files and Collections in LightJar storage can be shared with others, including fellow LightJar subscribers. Shared items are sent via email notifications that contain a subject line, your message to the recipient, and links to your content.
How to share a single file or collection:
- For sharing a single item, click on the share icon that is present on each thumbnail image (need to have your cursor on the thumbnail), or if the file is already opened, then click on the share icon in the upper left corner of the box holding the image. A share pop-up window is displayed. Enter the email addresses for the recipients, a subject, an expiration date for the share link, and a message for recipient, and then click Share Media Asset in the bottom right corner of the pop-up window;
- For sharing a Collection, click on the share icon that is present on each thumbnail image for a Collection on the View My Collections page, or if a Collection is already opened click the Share button to the right of the New Collection blue box. A share pop-up window is displayed. Enter the email addresses for the recipients, a subject, an expiration date for the share link, and a message for recipient, and then click Share Collection within the pop-up window.
A list of all your previously shared files is in the Shared tab. Here you see the file’s name, the date it was shared, the link’s expiration date, the email of the recipient, a button to copy the share link if you wish to use it again, and a button to delete the link so it is no longer active.
What the recipients see – Recipients receive an email from you via LightJar, stating that you want to share a file or collection with them. The email contains a link. Clicking the link takes the recipient to a landing page in LightJar from which they can do the following:
- Play, view or download the shared files from within their own browser;
- Review the titles and descriptions assigned to your files;
- For recipients that are LightJar subscribers, in addition to the email, they receive a message in the LightJar Message Center asking them to accept the sender’s invitation to share a file or collection, and if they accept the invite, the files are deposited directly into their LightJar account.
Receiving media files from other LightJar subscribers
LightJar subscribers can share items in their account with other LightJar subscribers. The sharing process is the same as just described in the previous section. Receiving shared files into your LightJar account first REQUIRES your acceptance to the originator’s invite to share items with you, before any files are deposited into your account.
Notification of an invite to share items with you, from another LightJar subscriber, comes to you in two ways; one to your email address associated with your LightJar account, and the second is a message in your LightJar message center. If new invites are present in the LightJar message center, there will be a number within a green circle displayed next to your user name. The number represents the number of un-read invites.
The LightJar message center can be found by clicking on your user name in the upper right corner of the LightJar screen and is the first item in the drop-down menu. Click on Message Center and notifications of invites from other users are displayed. For each invitation, you are able to accept or decline the files.
- When you accept an invite, a copy process begins and completes when all files are placed into your account. The transfer of small files is immediate, while the transfer of a large number of files or files that are large in size, may take anywhere from 5 to 15 minutes. When the copy process is completed, the word “completed” is displayed next to the invite message. You should mark the message as read when done.
- All shared files are displayed as thumbnail images on the My Media home page.
- If a Collection was shared, this collection will be displayed on the View My Collections page, as well as, in the drop-down listing in the Search Collections box.
- When you decline an invite, a notification is sent back to the originator that you have declined their invitation. You are also then given the option to delete this notification
- Note – at the present time, accepted invitations stay in the message center. These should be marked as read, so that when the number in the green circle appears, you know that you have “new” invites from other users.
Deleting files from your account
Go to the My Media homepage, and place your cursor over the file’s thumbnail image that you wish to delete. Click the red X. Answer yes to the pop-up question. Your deleted file is placed in the LightJar delete bucket where it stays for 30 days before final deletion and removal. Before 30 days pass, you can go to the Delete tab in LightJar, and restore the file back to the My Media page, or permanently delete it. To delete multiple files at once, go the My Media homepage and click the checkboxes for multiple images, go to the With Selected feature, and from the drop-down menu, choose Delete items.
Managing your subscription
When in LightJar, the drop-down menu underneath your login name in the upper right corner contains an item labeled Manage Subscription. Click this item to increase the size of your subscription, change your billing information, or cancel your LightJar subscription.
There are three (3) types of Subscription Plans to LightJar
- Active Plans for 24×7 immediate access to all files for play, download and sharing;
- Archived Plans (least expensive) used for backup and disaster recovery; restoration of files can take up to 24 hours;
- Managed Plans – a combination of the Active and Archived plans for cost savings – 24×7 access for frequently used files, and delayed access for files rarely touched, but stored in LightJar for backup purposes.
Subscription storage size determines pricing – the larger the number of gigabytes (GBs) associated with your subscription plan, the higher the monthly or annual prices. The more GBs you have, the more photos, videos, and other files you can store in your LightJar account
Restoring files from archived state
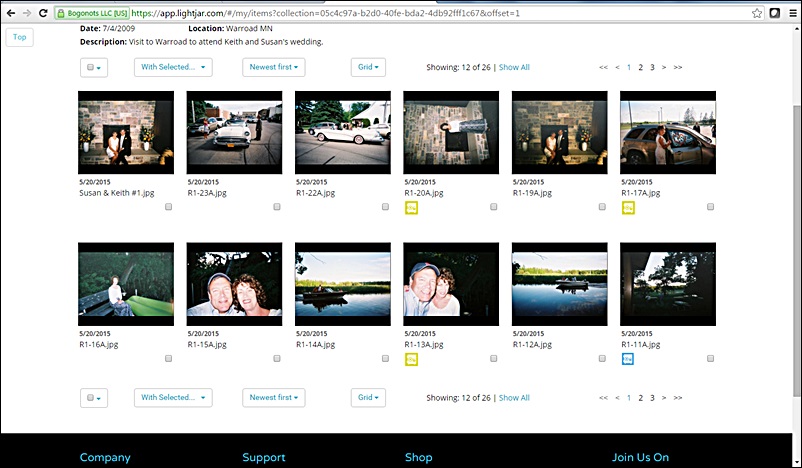
If you have a Managed or Archived plan as your subscription to LightJar services, you will have files that have been placed in archived state. The small blue safe below the thumbnail image above indicates that the file is archived. The small yellow safe below a thumbnail image indicates the item is in the process of being restored to active state so that it can be downloaded or shared.
If you initiate a download or share action on a file that is in archived state, you will first receive this message and question: “This is an archived file. Before downloading or sharing this file, it may take up to 24 hours to retrieve it from archived storage. Do you wish to continue?” Clicking yes in answer to the question begins the restoration process. During the process the yellow safe appears below the thumbnail image. When the image is restored to active state, the yellow safe goes away, and the file is available for downloading or sharing.
Final message about LightJar as a web application
LightJar is a web application made to work with your browser via a web connection to our cloud-based servers. Examples of browsers are Chrome, Firefox, Safari, and Internet Explorer. LightJar works best when your web browser is up-to-date (2015 vintage or newer) and your Internet connection is reliable and fast. If these two items are not optimal, some features in LightJar may not work as described in this guide.
Additionally, sometimes the web browser on your computer or smart device may be impacted by something else happening at the same time on your device, such as malware impacting your computer’s performance. If things are not working as described in this guide, we suggest you refresh your screen or possibly log-off and log back into LightJar. Many times, a refresh of the connection between your browser and our web servers can give the application a chance to catch up and continue in an acceptable manner.
LightJar is private, encrypted, highly durable, highly reliable. Your media content is hosted in LightJar servers, located in Amazon Web Services‘ (AWS) S3 and Glacier repositories, each advertised as having eleven (11) 9’s durability, or 99.999999999% retention of stored data. There is very little chance that your content will be lost. User data (name, address, etc.) is also stored in file servers within AWS. All user content and data is encrypted during transport and at rest.
If you have questions about this guide or a message for us, please chat with us, write us at support@lightjar.com, or enter a message in the Help section of LightJar.

